🎉 2.1 Creating Events
A complete guide to planning, creating, and publishing your events on Sweatpals.
Before You Begin
Before creating your first event, confirm the following:
✅ Your community profile is active and verified. ✅ Your Stripe account is connected. ✅ You have at least one cover photo ready (JPEG/PNG, 1920×1080 recommended). ✅ You’ve decided whether this will be a one-time or recurring event.
💡 Tip: Make sure your community visibility is set to Public if you want your event to appear in discovery feeds.
Step-by-Step: Creating an Event
Creating Experiences via Web
- Visit dashboard.sweatpals.com
- Select the Experiences tab
- Click the Create button
- Enter basic details: Name, Description, Location, Date & Time
Please note: If you are creating an online experience, drop in the meeting URL in place of an address.
- Add a Cover Photo and optional gallery images (up to 10)
- Add Pricing & Capacity (see: 💰 2.4 Event Tickets & Pricing2.4 "Event tickets & Pricing)
- Toggle on additional settings as you wish
- Review & click Publish
Creating Experiences via App
- From hosting mode, click Create (see: 🔄 1.3 Switching Between Profiles)
- Select Experience
- Select the experience you would like to create
Additional Experience Settings
You can use the following options when creating your experiences to meet your needs:
- +Waiver to add a waiver to your event.
- +Questionnaire to add custom questions for attendees to answer during registration.
- +Sponsors to add sponsors to your event.
- +Chat to open a group chat where all registered attendees can chat with one another.
- +Waitlist to allow attendees to join the waitlist and get notified when spots open.
- +Start Sales Day to allow the experience listing to go live, but open up sales at a future date.
- +Pixel Analytics to add your Meta Pixel or Google Tag ID to this specific experience instance.
- +Hide RSVP list to hide the list of attendees from the public event page.
- +Instructor to assign an instructor directly while creating or editing an experience.
- +Add-ons to include additional items attendees can purchase alongside their ticket.
- +Promo codes to apply available promo codes or discounts to your event.
- +Refund & Cancellation policy to configure refund, cancellation, or no-show policies that apply to that specific experience.
- +Platform Offer to opt your experience into Sweatpals' platform offers.
Waitlist Management
Manual Waitlist Management
By enabling the +Waitlist option, any prospective attendees who weren't able to sign up for the experience before it hit capacity will have the option to join the waitlist, where they enter their contact details.
When someone joins the waitlist:
- You can see all waitlisted members from the Waitlist tab within your event dashboard.
- You can manually reach out to waitlisted members when a spot opens up by using our Email & SMS tooling.
See: ✉️ 7.1 Email & SMS Campaigns
Coming Soon: We have a new waitlist feature that will allow you to set an automatic waitlist notification if preferred. Read below to learn more & to get early access, email [email protected].
Enhanced Waitlist Settings & Management (Coming Soon)
By enabling a waitlist, you can configure when and how prospective attendees move off the waitlist and into your RSVP list.
To enable a waitlist, simply:
- Select the +Waitlist toggle while creating/editing an experience, or open the Waitlist tab of your experience and click Enable waitlist
- Choose between:
- Auto-add: the next person in line is enrolled automatically and their credit is deducted. If they don't have a credit or membership, they get 15 minutes to book
- First to claim: for each open spot, the next 5 people in line are invited. They have 15 minutes to book, and if nobody claims the spot, it rolls to the next 5. This is the default option and is marked Best for event
- Manual: manage the waitlist yourself
- For Auto-add and First to claim, you'll have the ability to specify when the Automation stops before the experience, in minutes, hours, or days. The default is 2 hours
- Select Save
To view and manage your waitlist:
- Open dashboard.sweatpals.com
- Select the experience you're seeking to manage the waitlist of
- Go to the Waitlist tab
- To move someone off the waitlist manually, you can click the Book now button -> it will prompt you to either Charge now or Send invite to book
Adding Sponsors
You can showcase sponsor brands on any experience you host on Sweatpals. Sponsors appear on the event page so attendees can see who is supporting the experience.
To add a sponsor:
- Create/edit an experience
- Toggle on +Sponsors
- Upload the sponsor's logo, name, website link, and a short description
- Optional: toggle on Main Sponsor
- Sponsors will now appear on the experience listing in-app & via browser
Adding an Instructor
Hosts can now assign an instructor directly while creating or editing an experience.
To assign an instructor:
- Create/edit an experience
- Toggle on +Instructor
- Select or add an instructor
Please note: If you are having trouble adding someone as an instructor, be sure to check if they are assigned as an Owner, Leader, or Service Provider. Otherwise, you will not see them in the drop-down for instructor selection.
If the instructor is not already part of your team:
- Click +Add
- Select Manual or From Members
- If you select Manual, invite the instructor by email or phone
- Choose their role and service type
- Send the invitation
- Click Save or Publish
Add-ons
Creating add-ons
If you'd like to offer additional items during your event (e.g. water bottles, merchandise, etc) or extra services, you can include them as Add-ons while editing your event.
To include add-on options for purchase:
- Create/edit an experience
- Toggle on +Add-ons
- Choose between Product or Service
- Product is ideal for consumables or merch offered on-site during the experience.
- Service is best for optional experiences offered on top of your main event.
- Type in the name, price, and optional quantity
- For Products, you will have the option to specify tax code.
- For Services, you will have the option to specify tax code, set an additional duration, and select service providers.
- Select Save
Now, when someone selects a tier for your experience, any applicable add-ons will appear as an option for them before their checkout is complete.
Please note: These add-ons will appear for every tier option. We do not yet support tier-specific add-ons.
Editing add-ons
To edit previously created add-ons:
- Select the Point of Sale tab (See: 💰 6.5 Point of Sale (POS) on Desktop)
- Search for the add-on item
- Select the pencil icon next to the item's name
Activities Schedule
Adding a Schedule
To add a schedule of activities within your experience that attendees can sign up for after purchase:
- Create/edit an experience
- Toggle on +Schedule
- Specify your Signup windows - The start/end day and time that attendees can enroll in activities. You can also specify signup windows per tier.
- Toggle on/off to Limit activities per attendee - Controls the maximum activities that attendees can enroll in at a given time.
- Select +Add activity to begin adding to the schedule, where you can add in:
- Activity name
- Start and end day/time
- Room or location area
- Speaker
- Description
- Signups setting - Choose between No limits (anyone with a ticket can join), Limited spots (set how many people can join), and No signups (no signup needed).
- Select Save & continue adding activities as-needed.
- Select Save schedule.
For more on the activity booking experience, see: Schedule: Signing Up for Activities
Check-In for Activities
If you want to check signups into the activities they signed up for, you can do so by:
- Go to the Experiences tab
- Find & select the experience you've set up the schedule for
- Toggle to the Activities check-in tab
You will be able to check in signups, add signups manually, and remove/edit signups.
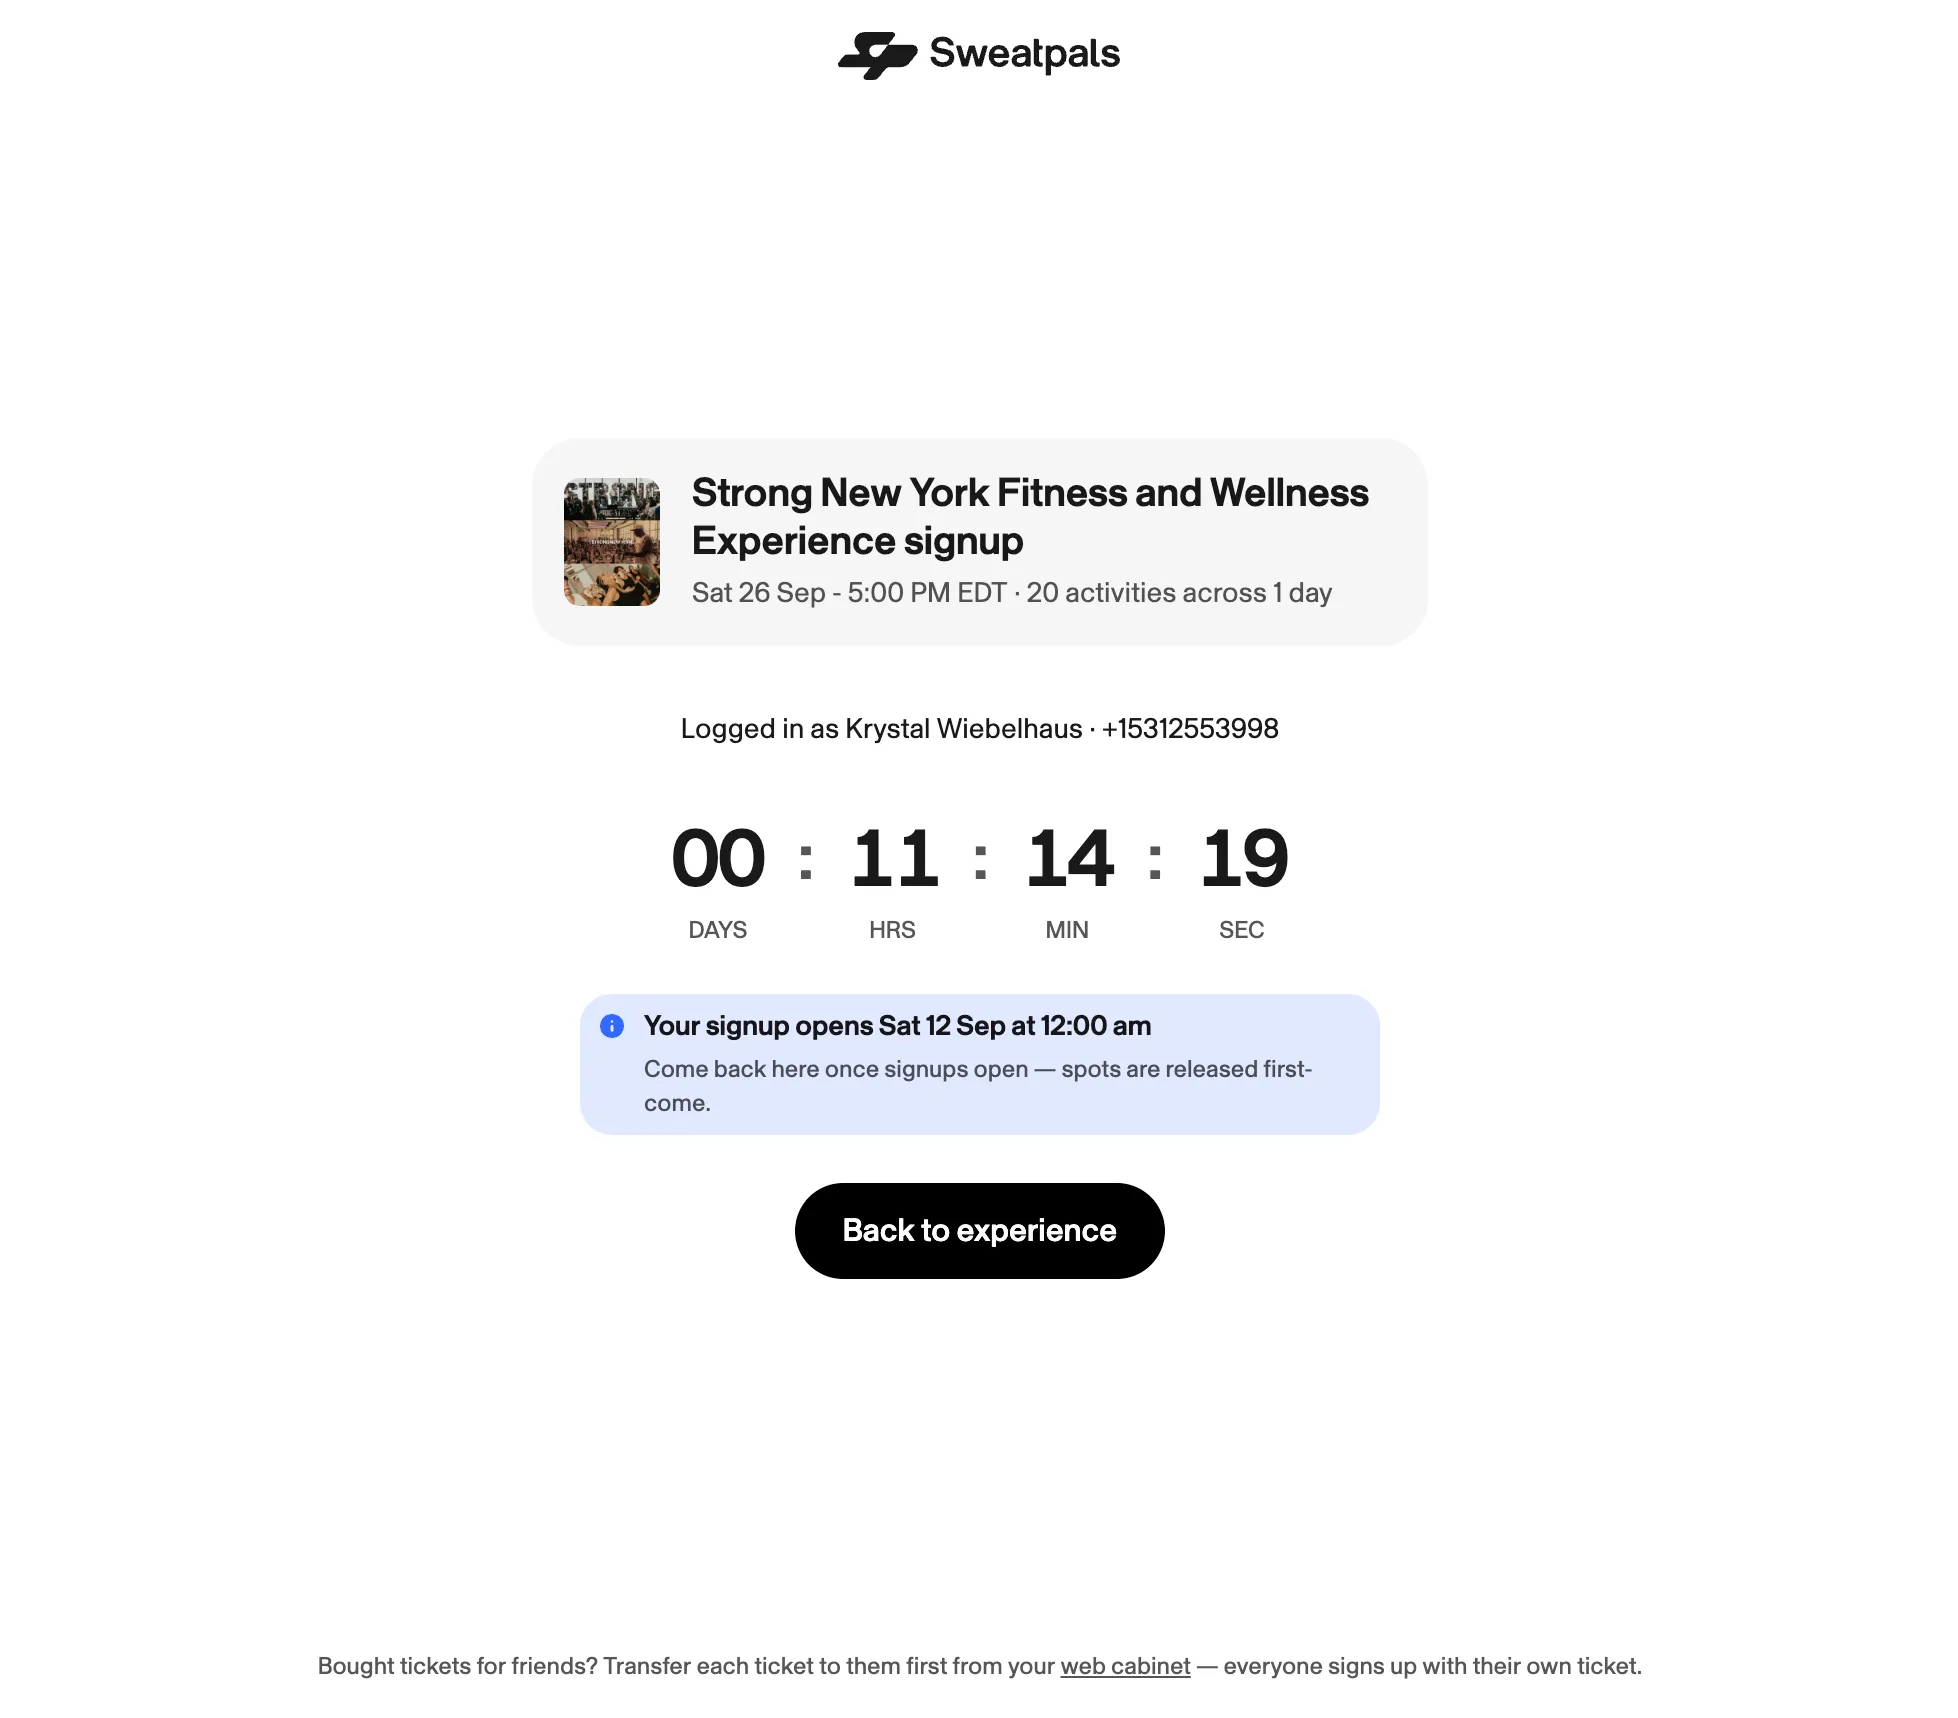
Prior to activities being live and open for signups, attendees will see a countdown to be able to view and enroll in activities. They will see a page like this:
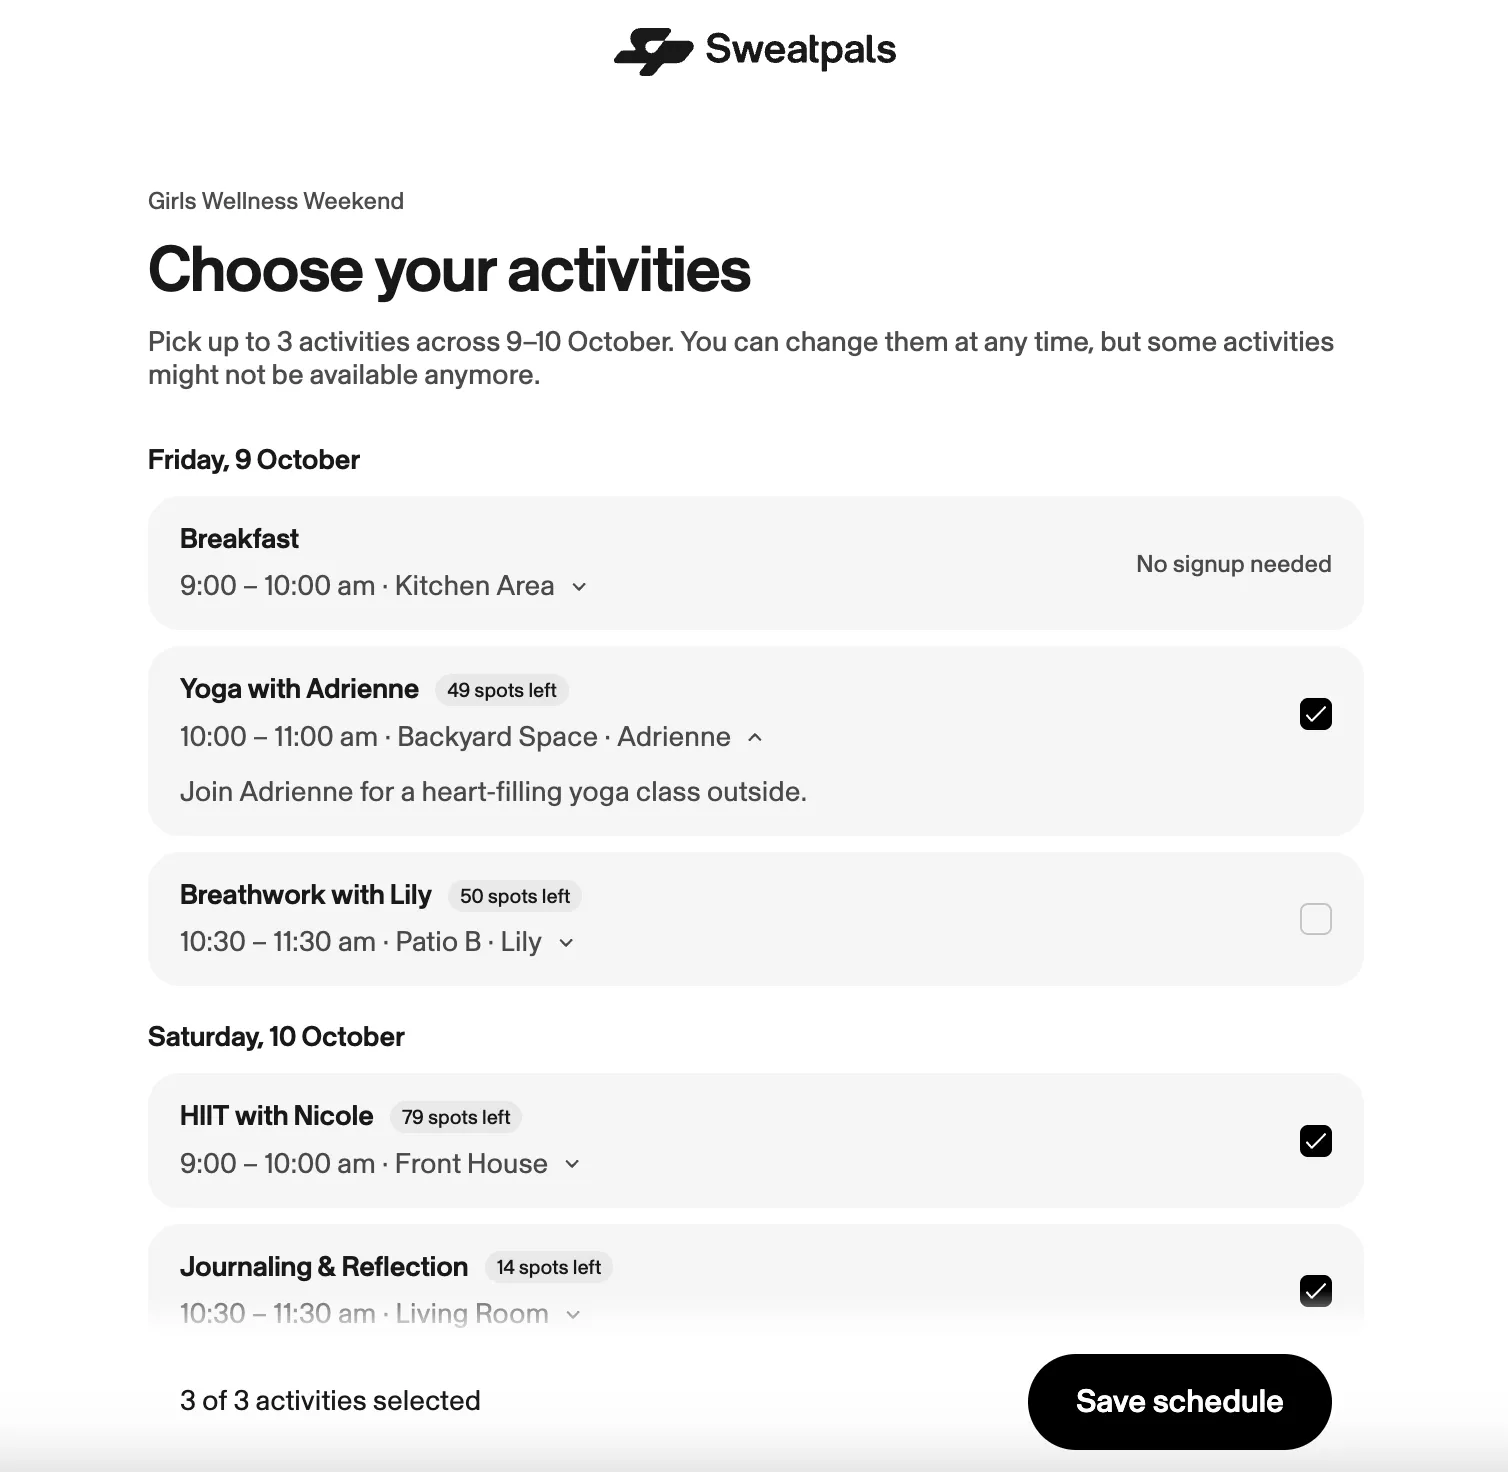
Once activities are live and open for signups, attendees will be able to view and enroll in activities. They will see a page like this:
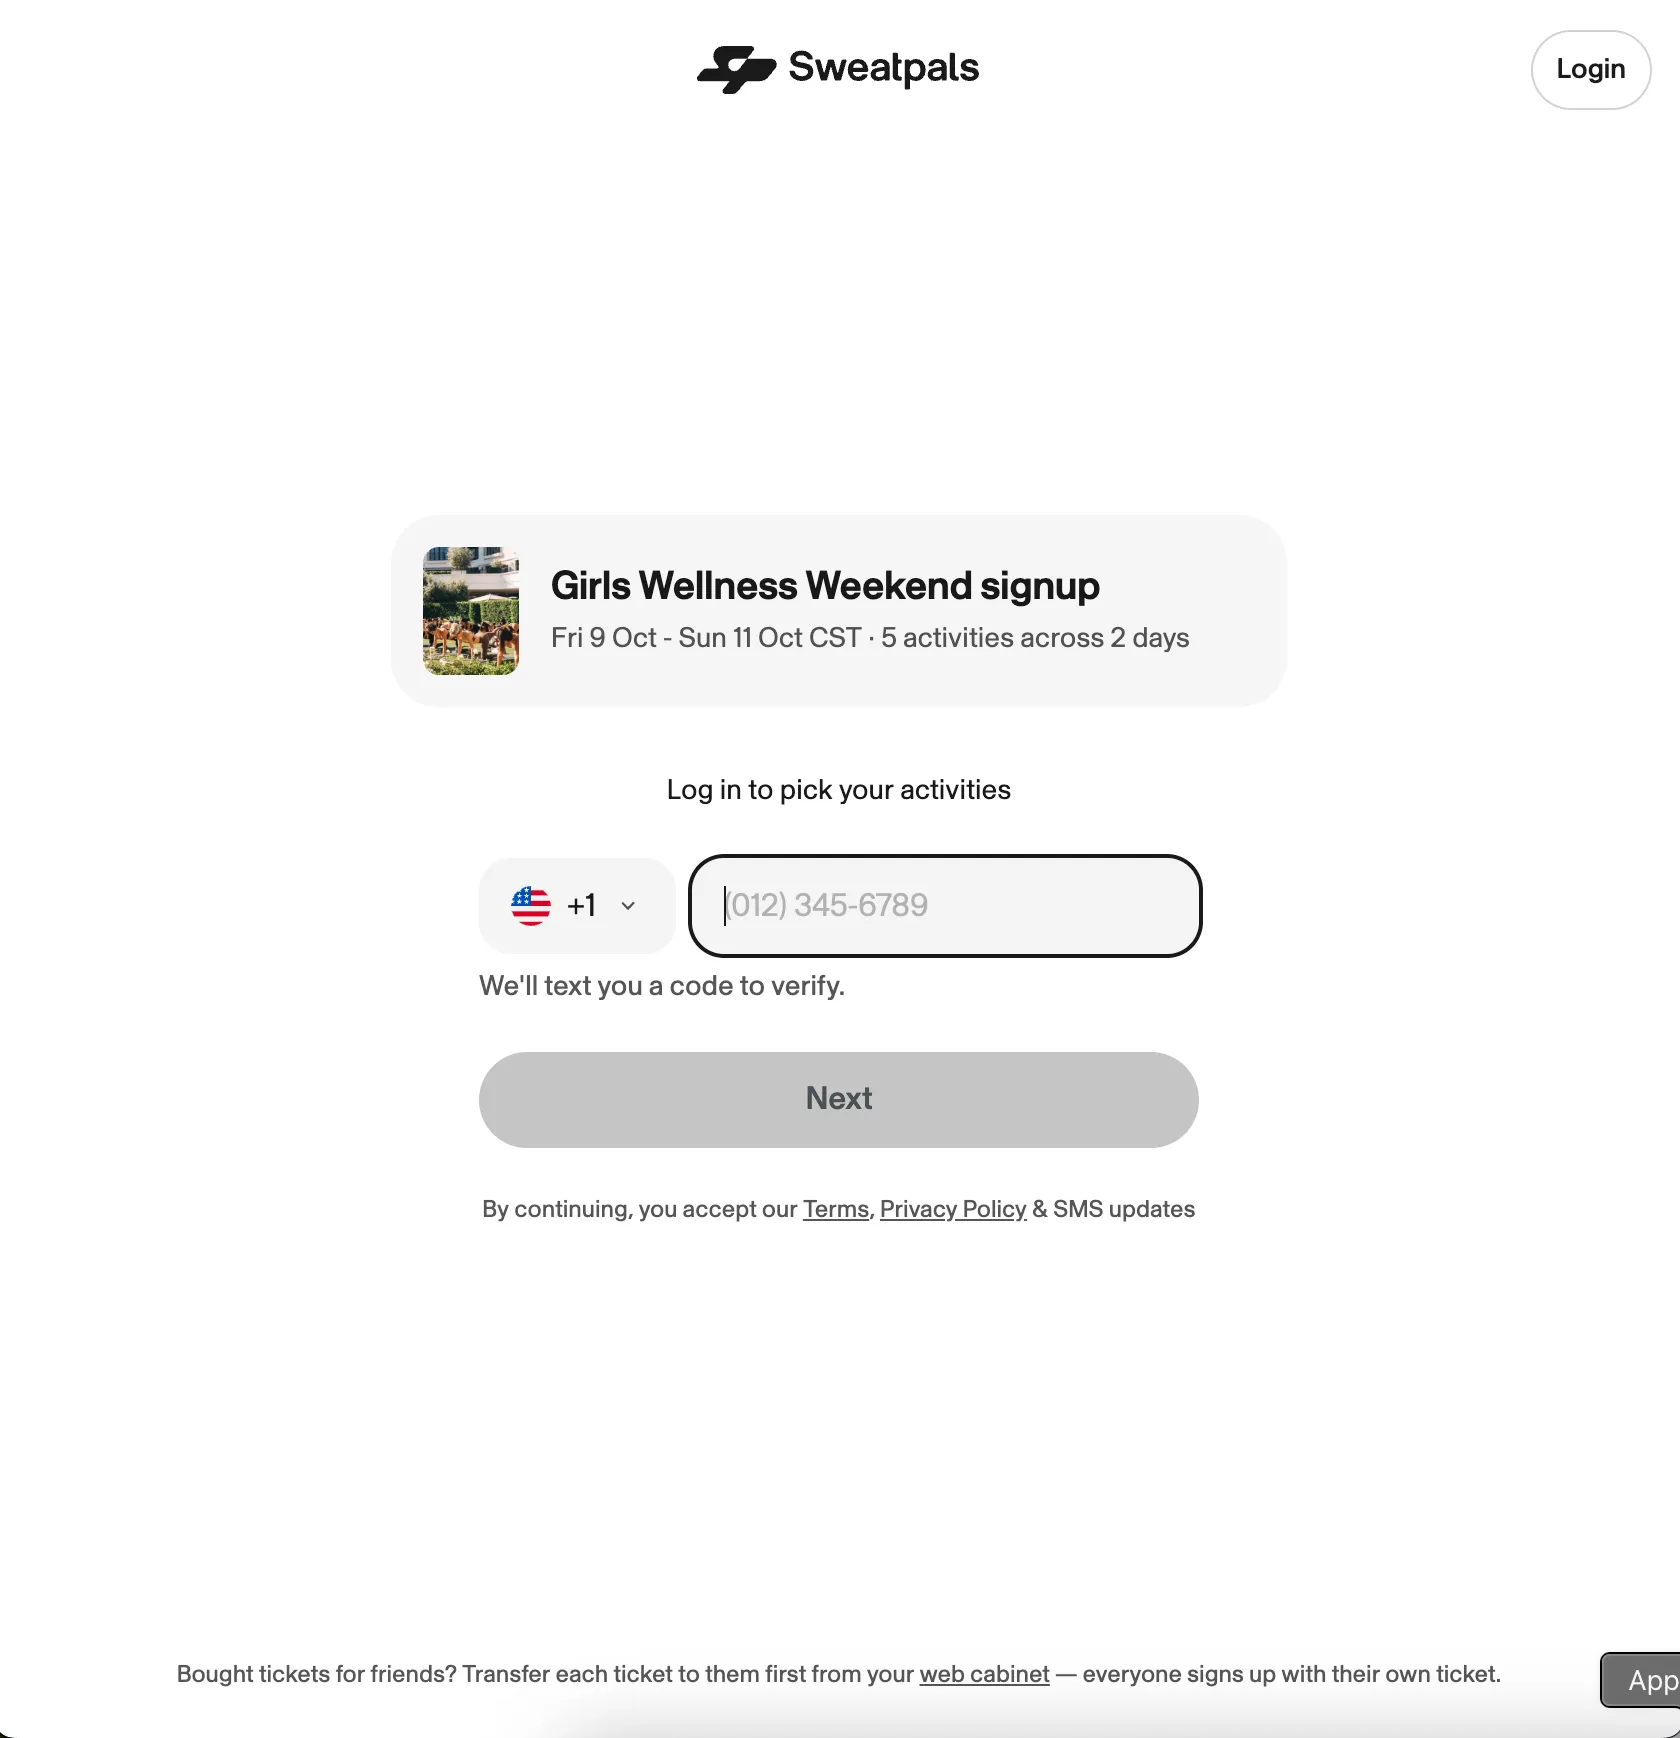
If someone shares the activity signup link with others, they will be prompted to log in before they can view and enroll in activities. They will see a page like this:
Email Notifications to Schedule Signups
Timing & Trigger | Message |
|---|---|
5 Days Prior to Signup Window | "Activity signups open in 5 days" |
1 Day Prior to Signup Window | "Activity signups open tomorrow" |
At Signup Window | "Activity signups are open" |
1 Day Prior to Signup Window Closing; Attendee Hasn't Signed Up for Anything Yet | "Signups close tomorrow. You haven't picked yet" |
Attendee Bought Ticket During Signup Window | "Activity signups are open" |
Attendee Saved Their Schedule | "You're on the schedule" |
Filled Activity Opens Spot | "A spot opened in {activity}" |
Activity w/ Signups Was Deleted | "{activity} has been cancelled" |
Attendee Added/Removed to Activity | You've been added to {activity} |
For more on the activity booking experience, see: Schedule: Signing Up for Activities
Please note: This feature is currently in Beta and available to select communities. To request this feature, please email [email protected].
Tips & Tricks
Recurring vs. Duplicating Experiences
Method | Best For | Notes |
|---|---|---|
Recurring Events | Same time, place, and format (e.g., weekly runs) | One setup, multiple sessions auto-generated |
Duplicating Events | Similar but not identical events | Copy an existing event, then edit date or description |
⚙️ Recurring events publish automatically for each selected date. Duplicated events remain independent drafts.
Recommended Image Specs
Image Type | Ratio | Size | Notes |
|---|---|---|---|
Cover Photo | 16:9 | 1920×1080 px | Required |
Logo / Thumbnail | 1:1 | 800×800 px | Optional |
Gallery Image | Any | < 5 MB | Optional |
Setting Up Multi-Day Events
When creating events that span multiple days like leagues or camps, you have some options to explore for better management.
- If you want one point of enrollment only: We suggest creating one experience listing that covers the entire duration of the experience.
- Using leagues as an example, you can set the Start Date as the first day of the league, and the End Date as the last day. The event's pricing should then be configured to account for the entire season.
- If you want attendees to confirm attendance for each day: We suggest creating individual experience listings & creating a plan that covers {X} number of experiences.
- Using skill clinics as an example, you can create individual clinic days as their own listings and set a prepaid clinic plan that covers {X} number of skill clinics.
- For more, see: ⚙️ 5.2 Creating & Configuring Memberships
Visibility Options
- Public: Visible across discovery feeds, search, and recommendations.
- Unlisted: Accessible only via direct invite or link.
- Only Members: Accessible only to those who have joined your community.
⚠️ You can change visibility anytime after publishing; the event link will remain active.
Why can I still see my unlisted event?
If you're logged in as the host or as an admin of the community, you'll still see unlisted events on your community page. This is expected. It lets you check and manage your event before sharing it.
Everyone else, including members and anyone who isn't logged in, won't see the event. They can only reach it through the direct link you share with them.
To double check how your event looks to others:
- Log out of Sweatpals, or open your community page in a private/incognito window
- Look for the event on your community page
- If it doesn't show up, everything is working as intended. Only people with the link can find it
Corporate Bookings
Sweatpals makes it easy to manage corporate wellness programs, team-building sessions, and group bookings with built-in invoicing and waiver collection.
- Create an Unlisted Event — This keeps your corporate session private from public view while remaining accessible via direct link.
- Choose Your Pricing Structure:
- Option A: Lump Sum — Create a single ticket type for the total corporate rate
- Example: "Corporate Wellness Package - $500" (covers 20 employees)
- Option B: Per-Person Pricing — Set individual pricing with bulk purchase capability
- Example: "Team Building Session - $25/person" (purchaser buys for entire group)
- Managing Attendees (Per-Person Option):
- The corporate purchaser can buy tickets on behalf of all participants
- Transfer tickets to individual employees to ensure:
- Each person signs their own waiver
- Everyone completes required health/safety questions
- Attendance tracking is accurate
- Send the Unlisted Event Link to the Purchaser – They will be able to complete the transaction from there and obtain their receipt.