🎫 6.8 Check-In on Web
Overview
While you can check-in your attendees using both versions of Sweatpals, our new Check-in tab on Sweatpals Web provides more flexibility for managing your experiences, and streamlines the process of managing attendees on location. It's ideal for gyms and studios, but event hosts can also make use of it.
To access it, head to your Dashboard's Check-in tab:
Check-in Options
Once in the Check-in tab, you'll see your community's recent activity. You can filter the view by specific experiences, simplifying the process of managing your attendees during the event date.
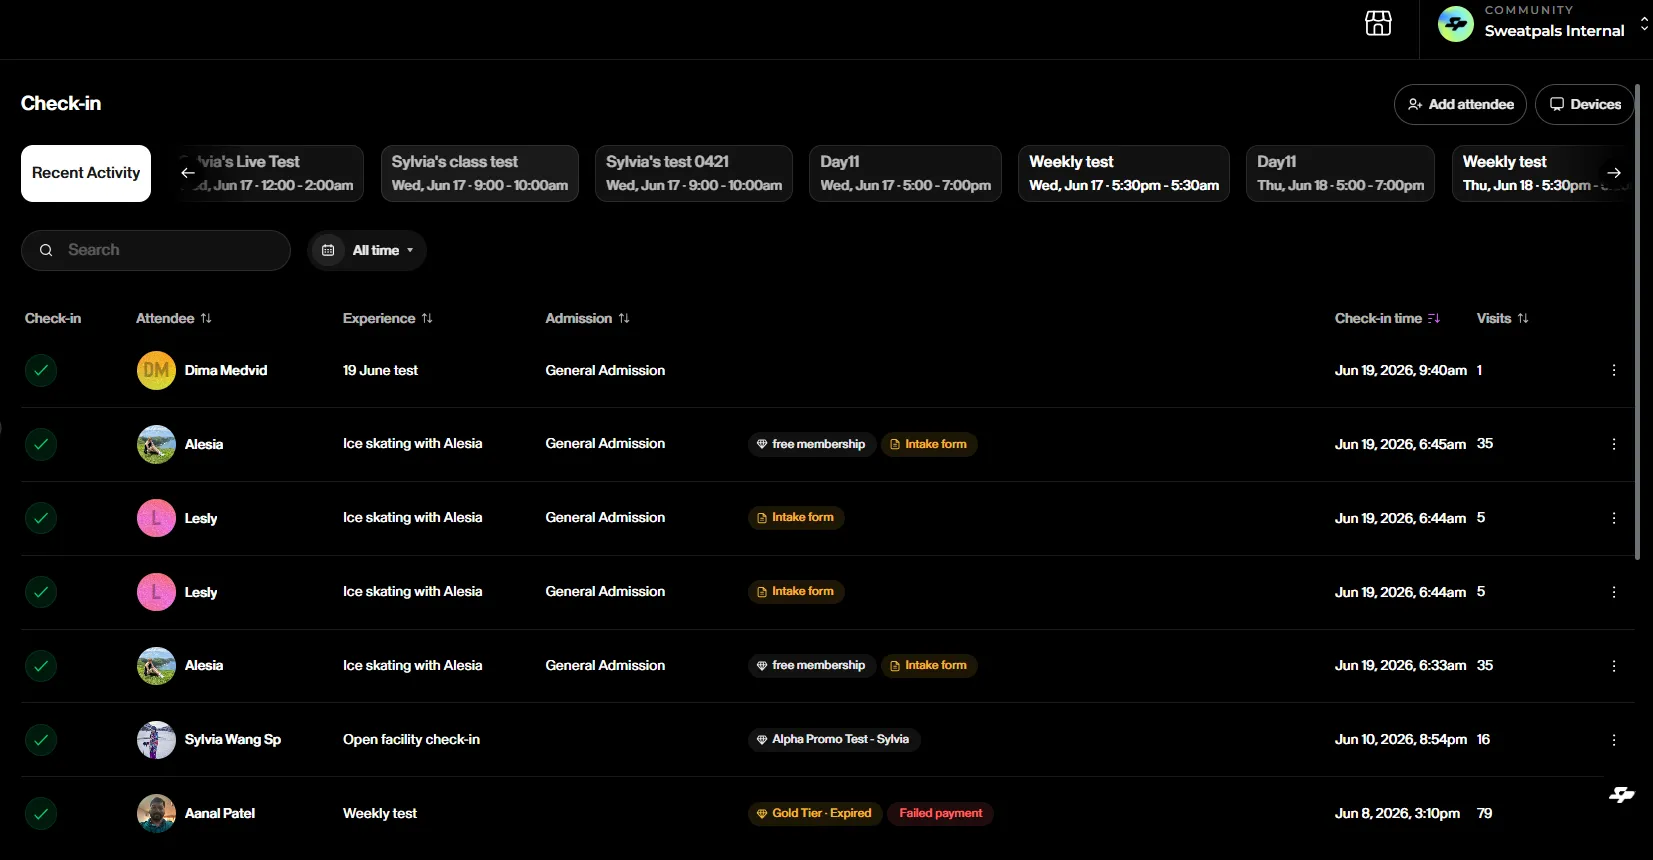
To add a new attendee, use the +Add Attendee option. You can choose to add someone that's already a part of your community, or use the Manual option to add someone new. You'll them be prompted to select a check-in type.
- Open facility check-in allows you to simply check in a member, without having it associated with an existing experience. This is ideal for gyms and studios handling operations on the spot.
- Experience lets you choose an experience you're hosting on Sweatpals, adding that member directly to the experience's list of participants.
Conversely, to undo someone's check-in, click on the green check icon next to their name.
By clicking on the More (...) button next to your attendee, you'll find these options:
- Refund: Refunds the associated purchase.
- Cancel ticket: Cancels the ticket and also refunds the associated purchase. If you need to remove an attendee without refunding them, please contact our support team and we'll help you out.
- Resend confirmation: Sends the member a copy of their confirmation email.
- Download Intake form: Provides a copy of any information provided by the member in a form.
- Undo check-in: If the attendee already checked-in, you can undo it in case any issues come up.
- Add note: Add unique notes to your community members for future reference.
- View profile: Zoom in on their profile to access more details.
Status Indicators
- Membership: Displays the name of the membership associated with the specific member. Hovering over this indicator
- Intake form: Indicates that the intake form associated with the experience was not filled by the member yet. Hovering over this indicator gives you an option to resend the form in case they missed it.
- Failed payment: Indicates that the purchase attempt failed at checkout. Further details can be viewed in the Billing page.
Initiating a Sale (POS)
In addition to checking in attendees and reviewing experience details, you can click on the Shopping Cart icon next to the member in to initiate a sale. You can get them started on a membership, or sell any items available in your location using our Point of Sale system.
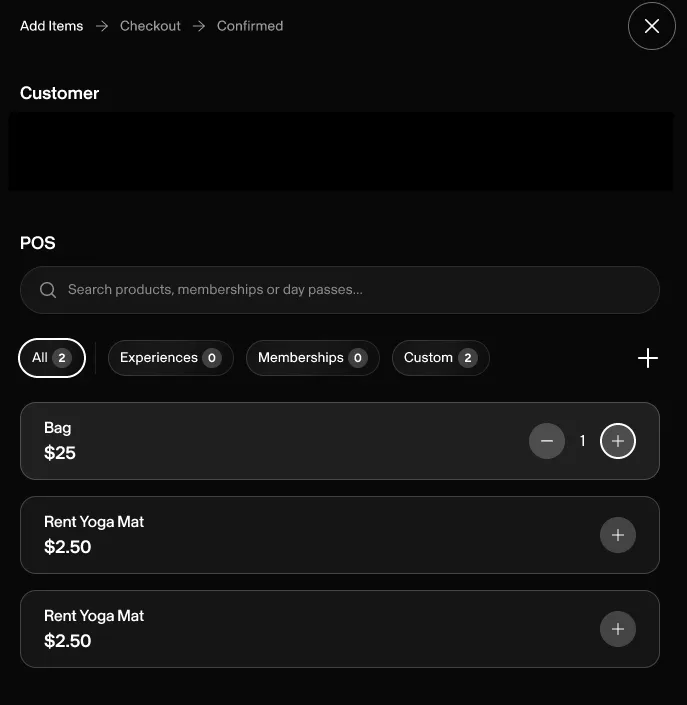
Connecting a Card Reader (First-Time Setup)
If you have a card reader that hasn't been set up yet, follow these steps before processing payments.
- Click on the Devices button in your Check-in tab. You can also start this process during checkout, by clicking on Reader. If not yet connected, it will show as Disconnected.
- Click + Add another to register a new device.
- Enter the Registration ID shown on the device.
- Add a custom device name for easy identification.
- Click Add to complete registration.
- Once connected, the device will show as Online / Ready. Click exit to return to checkout.
🔧 Troubleshooting: If the device isn't connecting, make sure it's connected to Wi-Fi. You must be connected to the same Wi-Fi as the device.
Connecting a Scanner
Scanner integration is currently in Beta and not available for all communities currently.
Aside from card readers, you can also connect a Scanner in order to scan QR codes and quickly check-in attendees during front desk operations. This allows you to process arrivals much faster compared to the manual check-in method.
To get started, click on the Scanner mode toggle to the top right of the Check-in page. Currently, we support the following Scanner models:
- USB/Cable connection: Honeywell, Zebra, Inateck, NADAMOO, or any other HID USB scanner.
- Bluetooth connection: SocketScanS720, Zebra DS2278. Pair them with your computer by heading to your System Settings -> Bluetooth.
Once connected, you can do a test scan by clicking on the Scanner button next to the toggle. If it's successful, you'll get a confirmation on the same page!